Google Analytics is a website analytics solution developed and supported by Google. The latest version is Google Analytics 4 (GA4).
In this tutorial, we will discuss step-by-step guidelines regarding how to setup Google Analytics on your site. Keep reading!
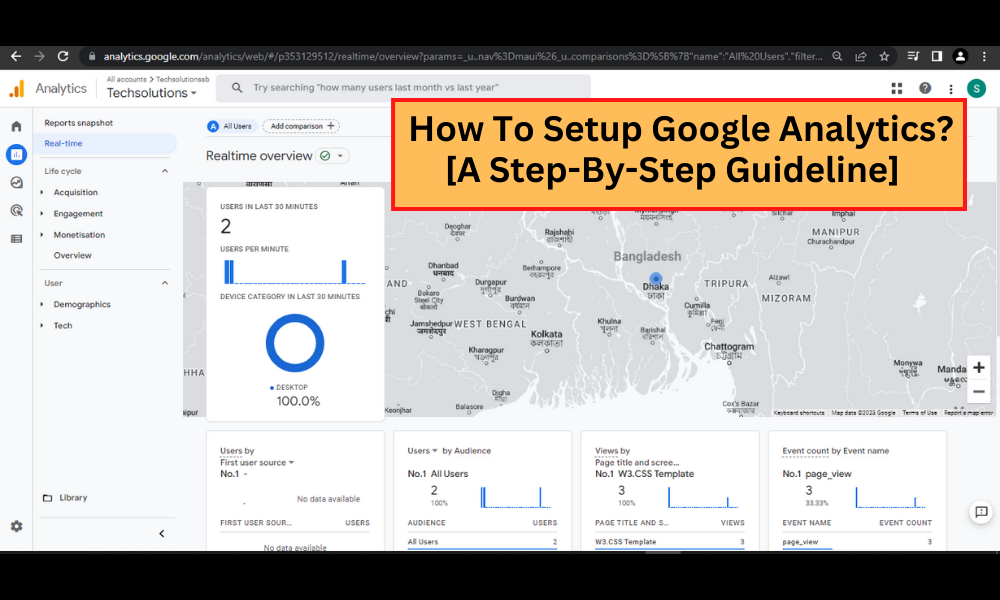
How To Setup Google Analytics? [A Proven Guideline]
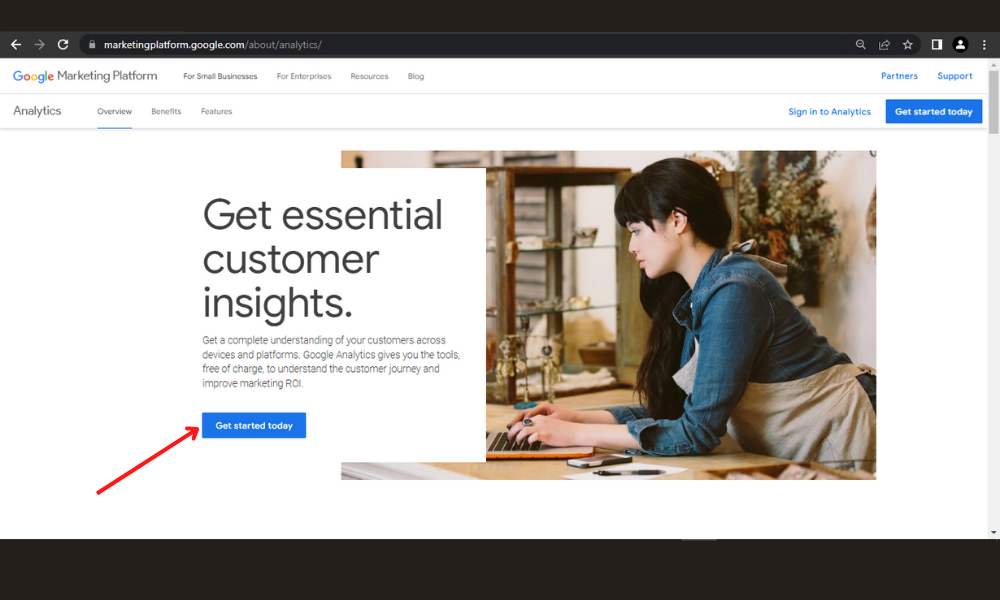
Step #1: Create Your Google Analytics Account
First of all, you’ve to create an account or sign in to Google Analytics. This link will take you to the Google Analytics page.
Click on the “Get started today” button
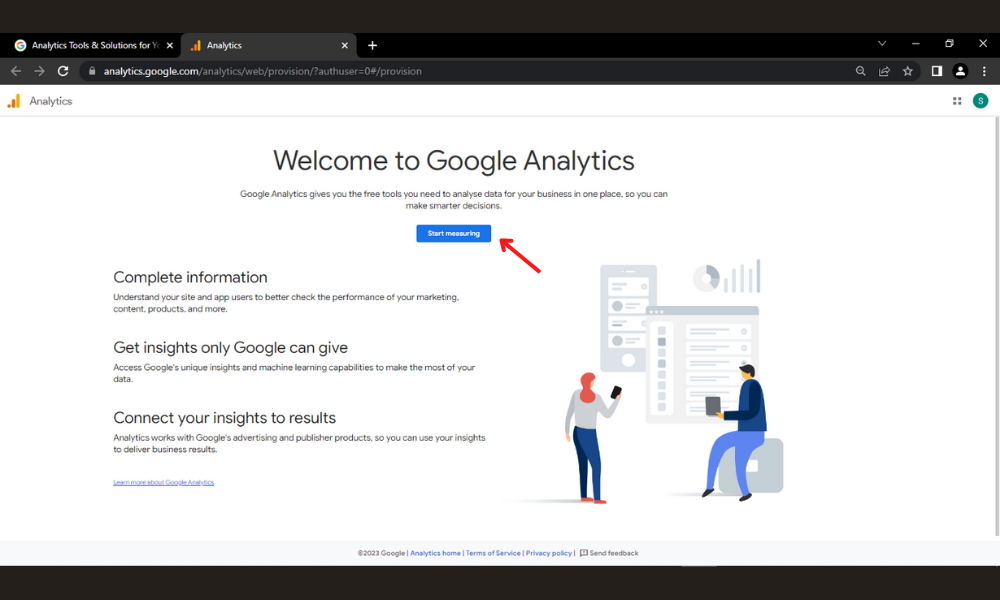
Step #2: Enter Google Analytics’s Welcome Page
After creating the Google Analytics account or signing in to this account, you’re welcomed to the leading solution. Then, click the “Start measuring” button to continue.
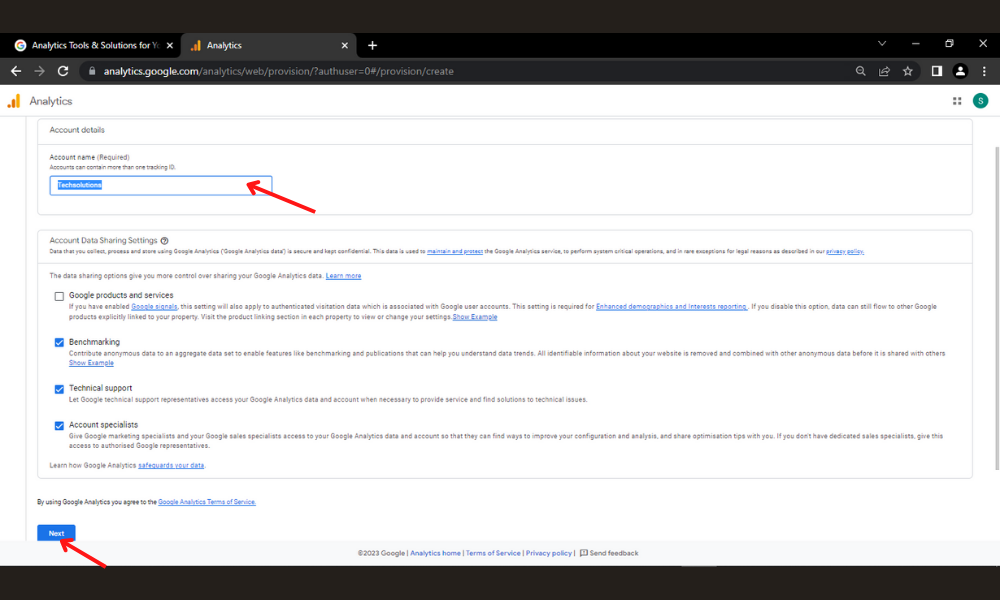
Step# 3: Setting Up The Account
Enter your account name. Then, make decisions about what type of data you want to share. Now, press the “Next” button.
Tips For You: One Google Analytics account can have more than one tracking ID. So, you can easily track more than one site with an account.
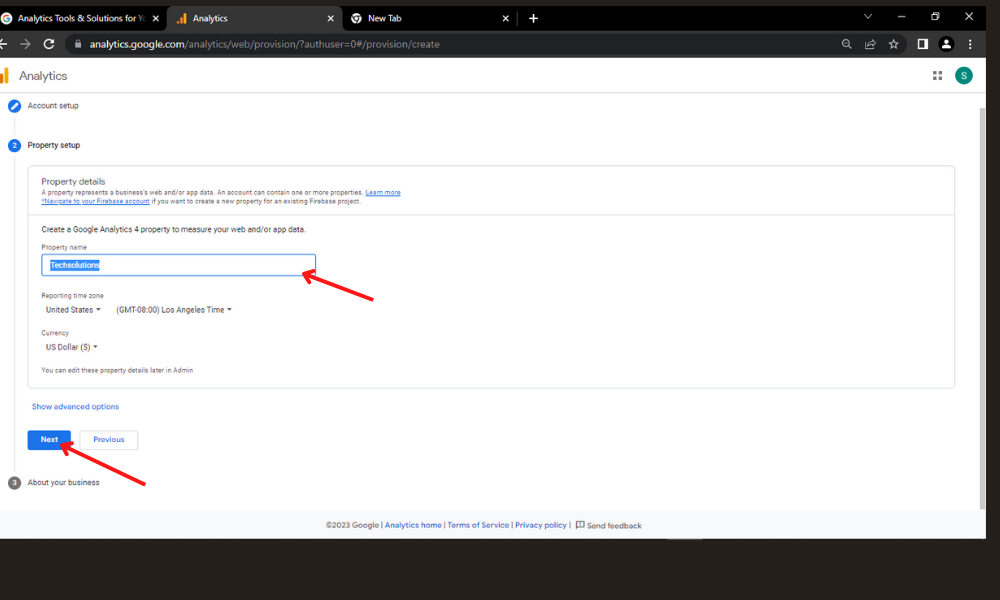
Step# 4: Do The Property Setup
Property is one service you usually measure, including an application, website, link tree, etc.
Now, enter your property name, time zone, and the currency you usually use.
Then, press the “Next” button.
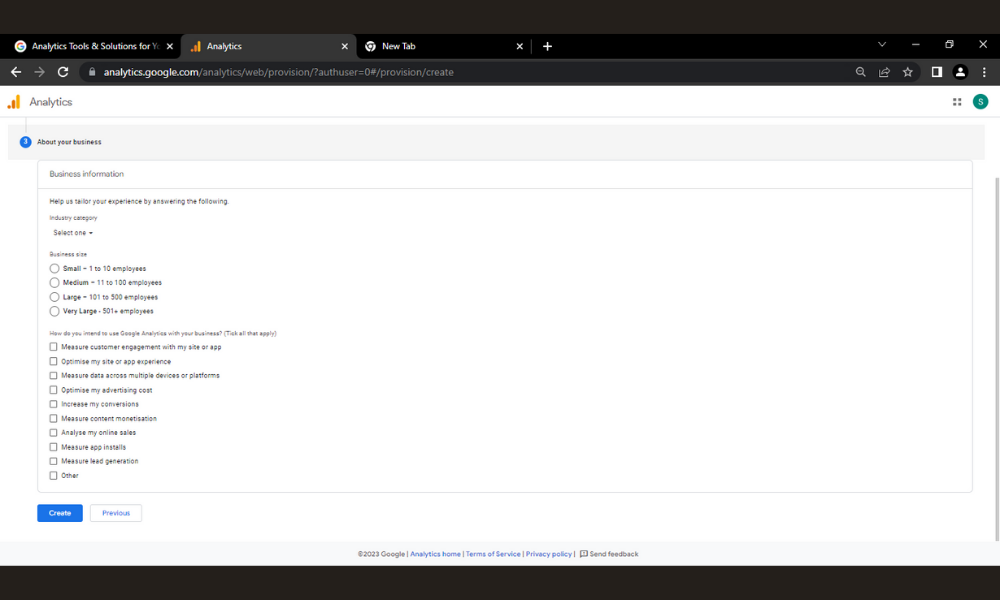
Step# 5: Add Your Business Information
Google Analytics can use the data to shape your overall experience.
Now, choose your preferred industry category. Then, select your business size. Tick the below boxes for how you’re planning to use Google Analytics.
Press the “Create” button to continue.
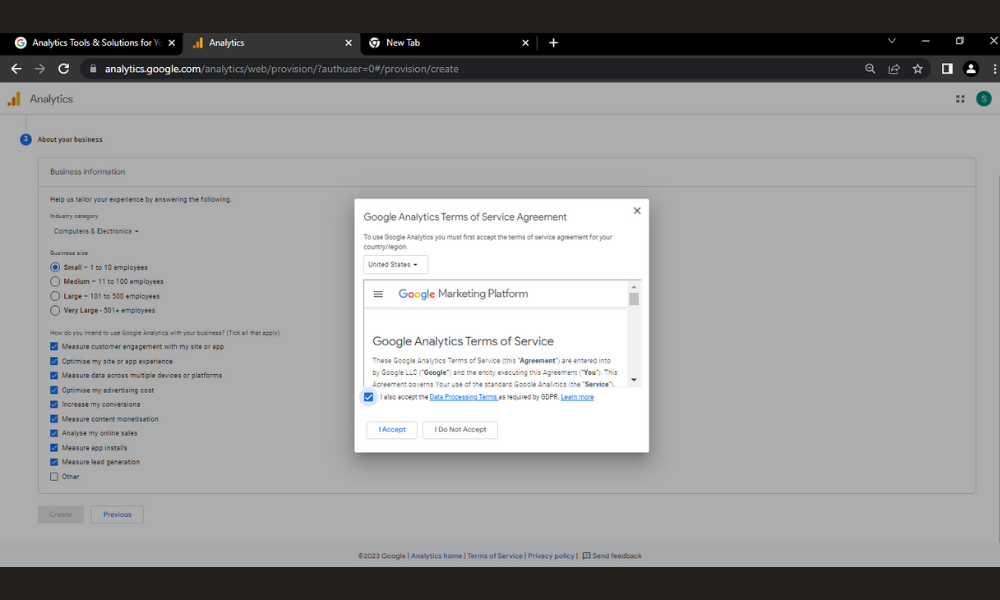
Step# 6: Accept The Terms Of Service Agreement
Hence, select your country or region. Then you can read and understand the terms of service mentioned. Now, tick the box [that says, I also accept the data processing terms as required by GDPR.]
Then, click on the “I Accept” option if you agree.
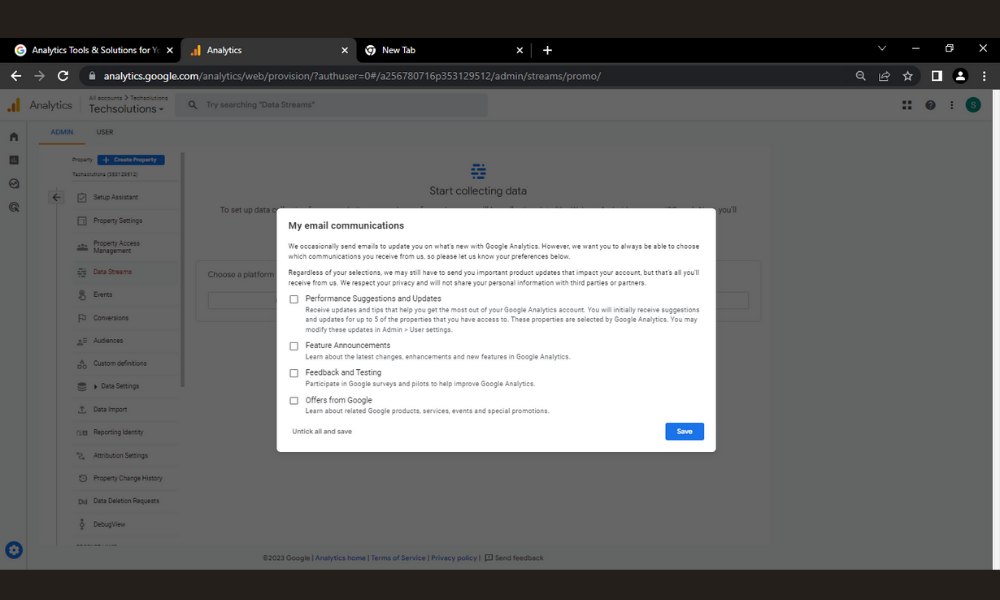
Step# 7: Getting Email Subscriptions Pop-Up
Therefore, you can check or uncheck all the boxes and then press the “Save” option to proceed.
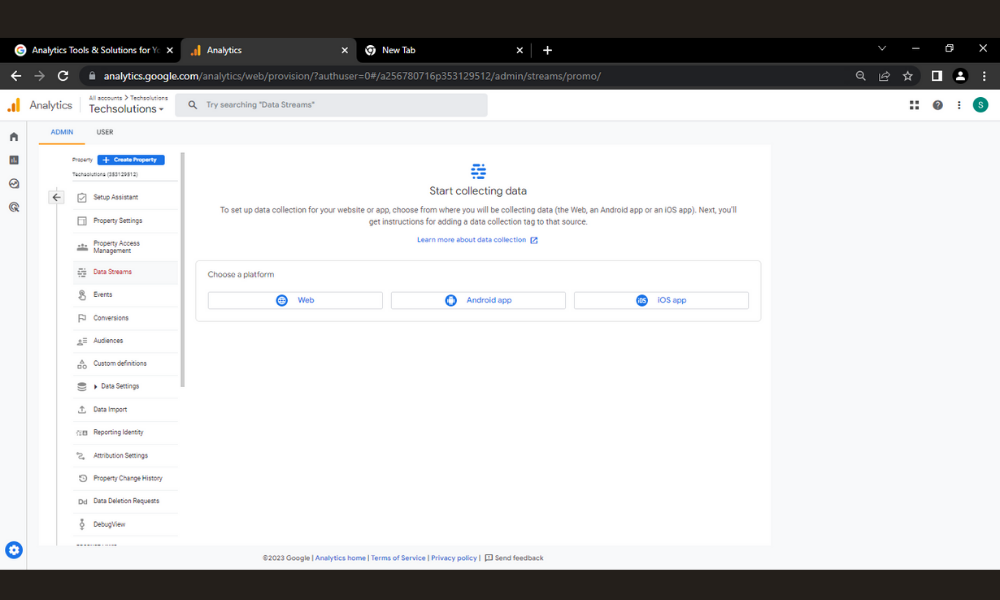
Step# 8: Chose Your platform
Now, you have to select the platform where you’re collecting information. Then, press your preferred platform to proceed. Here, we’re continuing with “Web” as an example for this tutorial.
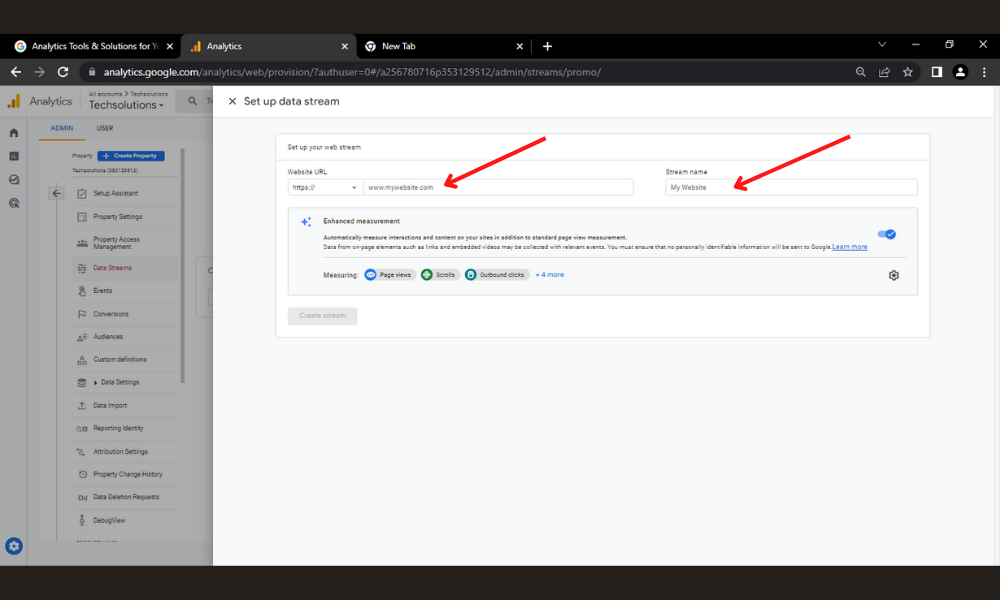
Step# 9: Setting Up The Data Stream Details
Enter your website’s URL and mention your stream name. It’s okay to enable the “enhanced measurement” option because it provides detailed contextual data and improves your overall understanding of the traffic.
Then, hit on the “Create stream” option to proceed.
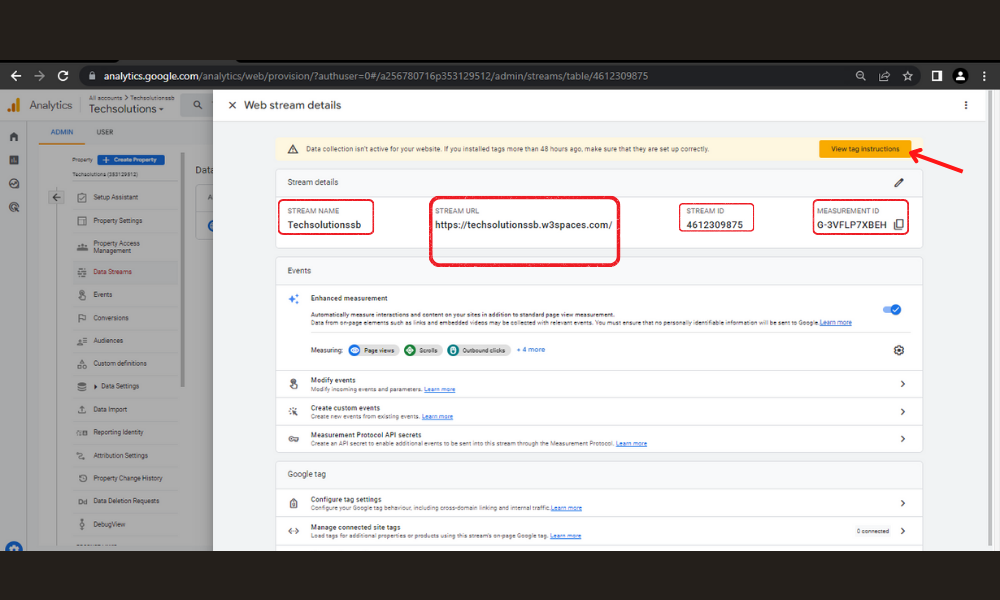
Step# 10: Overview Of The Web Stream Detail
Hence, you can see a complete overview of the web stream, such as the stream name, stream URL, stream ID, and measurement ID.
This blog post will use the global site tag (gtag.js). It is the quickest way to run on your site and is simple to install manually.
Now, click on the yellow button named “View tag instructions”.
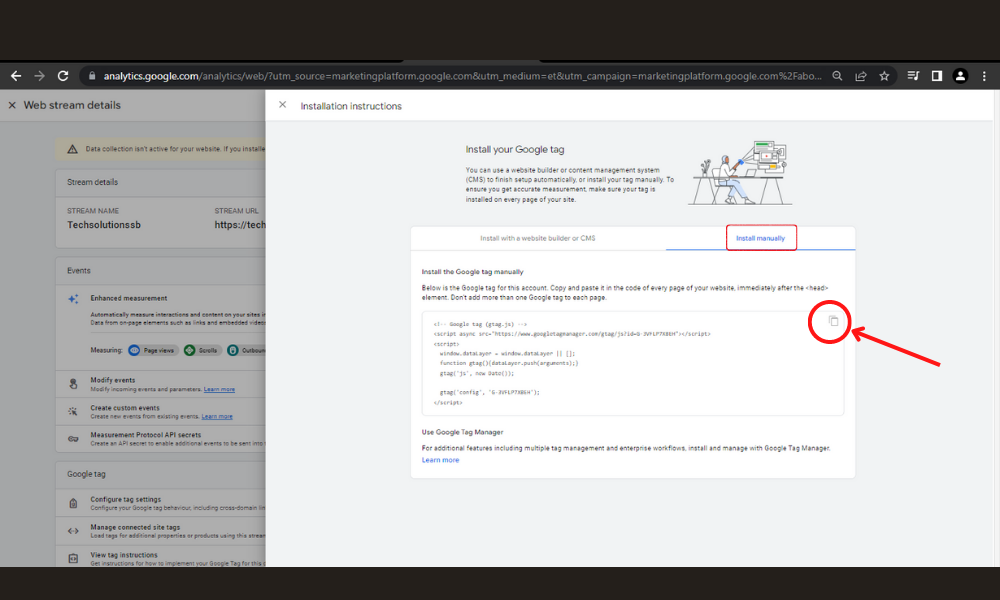
Therefore, you will get a pop-up window named “Installation instructions”. Then click on the “Install manually” option. Now, you will see the Google tag (gtag.js) for this account. You need to copy and paste it into the code of each page of your site.
Copy the code snippet (gtag.js) and paste the code just below the <head> tag in your HTML. Then, save and publish the code.
Step 11: Verify That It Works
Open the URL for your connected website in the data stream. Then, press “Real-time” from the left side of the menu bar. Ensure that you’ve got yourself as the active user.
Congratulations! You’ve successfully enabled Google Analytics for your website.
Final Thoughts For How To Setup Google Analytics
We hope you’ve learned the crucial steps from this tutorial about how to setup Google Analytics on any website. Learn more about google analytics features.
Do you have any questions about this blog post? Please comment below. We’ll get back to you soon!